Once a heating coil or cooling coil design is complete, it is transmitted electronically to the factory floor and the production process begins. The specifications for each component are sent to the appropriate team, allowing multiple components to be worked on simultaneously to minimize lead times.
Building the coil components
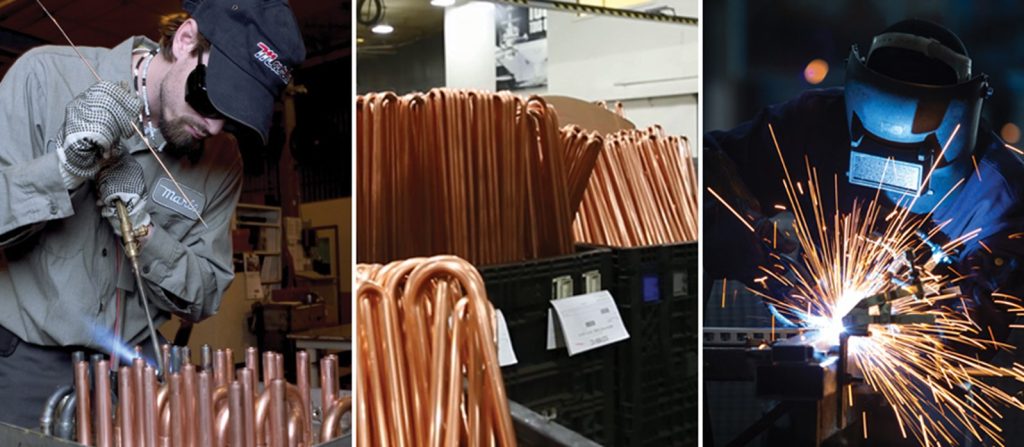
The tubes inside the coil, typically made of copper, are bent with automated hairpin benders in most cases, resulting in precise bends and reducing the number of brazed joints that will be required. On extremely long coils when hairpin benders cannot be used, the tubes are cut to exact length to eliminate any waste.
A variety of sophisticated, high-precision machines are used to produce a coil’s casing. Automated laser cutters quickly cut the casing design out of heavy-gauge metal sheets. The casings are then formed using precision press brakes and CNC panel forming equipment. Casing walls can be bolted together or welded, and can be made airtight when needed to meet application requirements.
The coil’s fins, which are critical to the heat transfer performance of the coil, are formed on automated, high-speed presses, which provide consistent quality. We offer three fin patterns to meet various heat transfer and air pressure drop needs – Turbex fin, M fin and flat fin
The headers, which connect the coil to your system and distribute the fluid or steam to the tubes, are manufactured on equipment specifically designed for this purpose. The header tubes are machined or formed to meet the requirements of each individual coil. The connection stubs that attach to the headers are typically made of steel and copper, although red brass, stainless steel and other materials are also available to meet unique needs. The headers are assembled using a special fixture to ensure that once they are mated to the coil, all dimensions will match the requirements of the customer drawing.
Putting it all together
Once the tubes, headers, fins and casings have been produced, it’s time to put all the pieces together. The tubes are inserted – or “laced” – through the fins and casing, as well as through tubesheets, when needed. Next, the tubes are expanded to create a mechanical bond to the fins, allowing for maximum heat transfer.
In most cases, the nearly completed coil then moves on to our brazing department, where experienced, certified brazers make all the necessary copper tube connections using a special torch and silver solder. The amount of silver is adjusted based on the specific type of joint required. This typically entails brazing copper return bends onto the copper tubing (although other tube materials are also available), resulting in long-term, leak-free performance of the coil.
Headers and connection stubs are then added to the coil, usually via brazing or welding depending on the materials and specifications. Finally, any special features are added, as required, such as drains, covers, header wraps, flanges, etc.
The final step: testing
Now the completed coil is ready to move on to our stringent testing procedures, which will be covered in Part 3 of this series. At Marlo, we take coil testing extremely seriously. It is our constant focus on quality and commitment to testing that allows us to offer an industry-leading 3-year warranty on all of our products.
If you missed Part 1 of this series, on coil design, read Part 1 now.
Email Registration
Please complete the form below to sign up for our news alerts and other email communications.
"*" indicates required fields